Getting started with AWS Lambda Layers for Python
You want to avoid errors that can occur when you install and package dependencies with your function code? You want to keep your…
You want to avoid errors that can occur when you install and package dependencies with your function code? You want to keep your deployment package smaller and cleaner? Right, me too!
Say hello to Lambda Layers! With Lambda Layers, you can configure your Lambda function to import additional code without including it in your deployment package.
Let me explain — A Layer is a ZIP archive that contains libraries and other dependencies that you can import at runtime for your lambda functions to use. It is especially useful if you have several AWS Lambda functions that use the same set of functions or libraries — you know, code reuse :-)
Since I build most of my experiments in python, I want to show you a small example of using Layers in Python :-)
Before we get started, it is very important to understand that when a Layer ZIP archive is loaded into AWS Lambda, it is unzipped to the /opt folder. For your Python lambda function to import the libraries contained in the Layer, the libraries should be placed under the python sub-directory of the /opt folder. For other supported runtimes, check here.
Let’s get started!
First, let’s create a file called custom_func.py and write a dummy function in it that will print out “Hello from the deep layers!!” message.
def cust_fun():
    print("Hello from the deep layers!!")
    return 1
I store that custom_func.py file in a directory called python. So, for my example, I have a directory structure like this:
As mentioned earlier, with Lambda Layers, you put the common components in a ZIP file and upload it as a Lambda Layer. So, let’s ZIP the folder with the file custom_func.py in it.
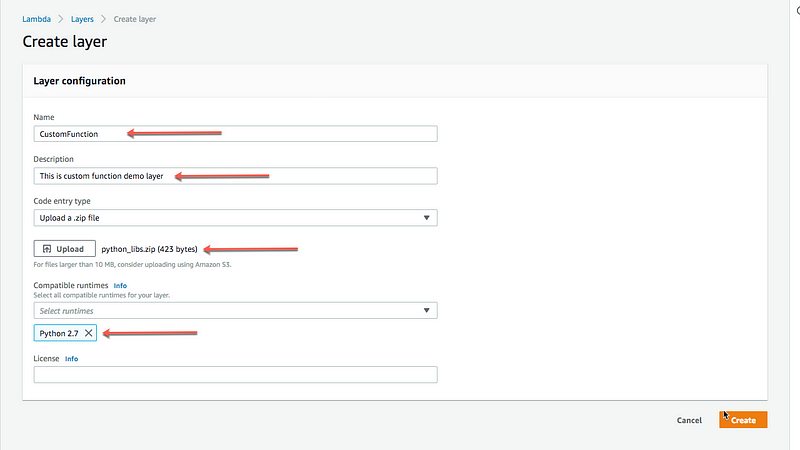
The output of that ZIP command creates a file called python_libs.zip which we can upload to Lambda Layers. To do that, get into the AWS Lambda Console and click create layer as below.
To create a new layer, you have to give it a name, write a short description (optional), select the ZIP file to upload and finally select the runtime for your layer. I call my layer CustomFunction, add a short description, select the ZIP file created above — python_libs.zip, and select Python 2.7 as the runtime for our Layer.
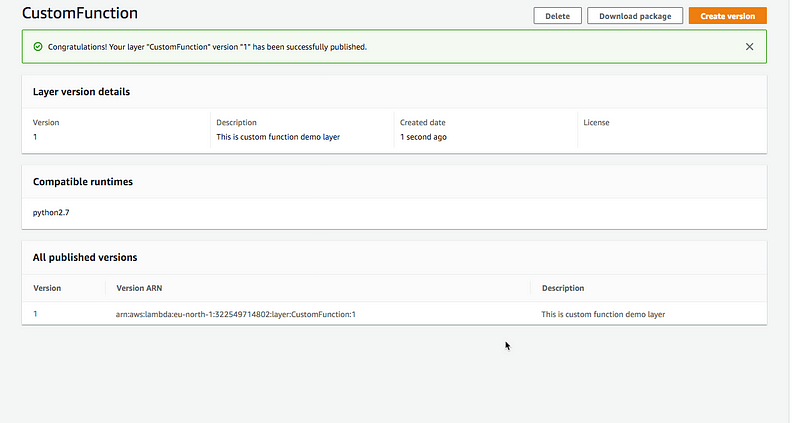
Once you click create, you should see a confirmation message “Congratulations! Your layer “CustomFunction” version “1” has been successfully published”. The new layer is now available to Lambda functions.
To test that newly created layer, author a small lambda function from scratch, give it a name, e.g LambdawithLayer, select the runtime, for our example I select Python 2.7, and select the existing role lambda_basic_execution. Click Create function.
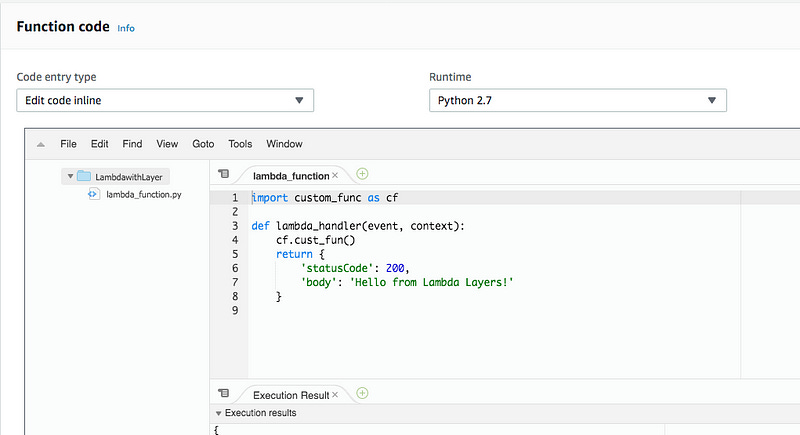
Once the function is created, replace the generic function code with the one below.
import custom_func as cfdef lambda_handler(event, context):
cf.cust_fun()
return {
'statusCode': 200,
'body': 'Hello from Lambda Layers!'
}Notice that you can easily import the custom function from the layer using import custom_func as cf. That is because Lambda runtimes include paths in the /opt directory to ensure that your function code has access to libraries that are included in layers — and for Python 2.7, the full path is /opt/python . For Python 3.6 and 3.7, that full path is /opt/python/lib/python3.6/site-packages and /opt/python/lib/python3.7/site-packages respectively.
Before testing the Lambda function, you have to configure it to use our layer CustomFunction. Click on Layers has shown bellow.
Click Add Layer.
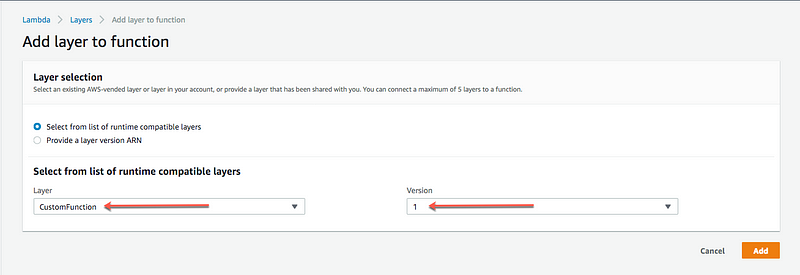
Select the Layer CustomFunction and the version of choice. Click Add.
Save the newly created layer configuration to your lambda function by clicking Save as shown bellow.
Use the default test event and click Test. You should see the execution result as bellow.
Notice the print resulting from the custom function marked with the arrow above? “Hello from the deep layers!!” — Well done, it worked!
That’s it — I just wanted to give you a short example of using Lambda Layers with Python. Of course, all the steps above can be replicated using the AWS CLI and frameworks like AWS SAM and the Serverless framework.
To learn more about Lambda Layers, check the documentations here.
Finally, to help you get started, there is also a Github repository that references popular Layers: https://github.com/mthenw/awesome-layers. Submit yours!
In my next post, I will use Lambda Layers to deploy small latency monkeys to AWS Lambda functions. Stay tuned!
-Adrian


